Stripe
Let's set up Stripe to accept recurring payments (subscriptions) and access the customer portal. You'll need a Stripe account set up.
Firebase Extension
The Stripe Firebase Extension accept subscription payments in your application with ease. Users can purchase different pricing tiers, and the extension will automatically sync the customers' subscription status with Firestore. It also adds a custom claim to Firebase Authentication, making it easy to know when a customer is on a paid tier.
First, install the extension in the Firebase console. This extension requires the "Blaze" plan. This is pay-as-you-go and you'll only incur charges if you start scaling. If you're worried about this, you can set budget alerts. It's likely you won't hit paid pricing for awhile.
- Since we've previously defined our users table as
users, let's use that instead ofcustomers. - In the Stripe Dashboard, create a new restricted key with write access for the Customers, Checkout Sessions and Customer portal resources, and read-only access for the Subscriptions resource.
- Copy the API key into Firebase.
- Click Install extension. We will replace
FILL_IN_FROM_POSTINSTALLafter installing the extension.

Configuring the extension
Set your Cloud Firestore security rules
It is crucial to limit data access to authenticated users only and for users to only be able to see their own information. For product and pricing information, it is important to disable write access for client applications. Use the rules below to restrict access as recommended in your project's Cloud Firestore rules. This builds off our previous section on security rules.
rules_version = '2';
service cloud.firestore {
  match /databases/{database}/documents {
    match /${param:CUSTOMERS_COLLECTION}/{uid} {
      allow read, write: if request.auth.uid == uid;

      match /checkout_sessions/{id} {
        allow read, write: if request.auth.uid == uid;
      }
      match /subscriptions/{id} {
        allow read, write: if request.auth.uid == uid;
      }
    }

    match /${param:PRODUCTS_COLLECTION}/{id} {
      allow read: if true;
      allow write: if false;

      match /prices/{id} {
        allow read: if true;
        allow write: if false;
      }
    }
  }
}
Configure Stripe webhooks
You need to set up a webhook that synchronizes relevant details from Stripe with your Cloud Firestore. This includes product and pricing data from the Stripe Dashboard, as well as customer's subscription details.
Here's how to set up the webhook and configure your extension to use it:
- Go to the Stripe dashboard.
- Click Add Endpoint.
- Use the URL of your extension's function as the endpoint URL.
- Select the following events:
product.createdproduct.updatedprice.createdprice.updatedcheckout.session.completedcustomer.subscription.updatedcustomer.subscription.deleted
- Using the Firebase console or Firebase CLI, reconfigure your extension with your webhook’s signing secret (such as,
whsec_12345678). Enter the value in the parameter calledStripe webhook secret. This is where we replaceFILL_IN_FROM_POSTINSTALLfrom before.
Create product and pricing information
For Stripe to automatically bill your users for recurring payments, you need to create your product and pricing information in the Stripe Dashboard. When you create or update your product and price information in the Stripe Dashboard these details are automatically synced with your Cloud Firestore, as long as the webhook is configured correctly as described above.
As mentioned in the last section, we have three different pricing tiers we'll want to offer for Fast Feedback. Let's add this information to the Stripe dashboard.
- Ensure View test data is toggled at the bottom of the dashboard.
- Navigate to the Products section in the Dashboard.
- Click Add product.
- Select “Recurring” when setting the price.
- Configure the pricing plan.
Products created in test mode can be copied to live mode so that you don’t need to recreate them. In the Product detail view in the Dashboard, click "Copy to live mode" on the upper right corner. You can only do this once for each product created in test mode. Subsequent updates to the test product are not reflected for the live product.
Adding Custom Claims
If you want users to get assigned a custom claim role to give them access to certain data when subscribed to a specific product, you can set a firebaseRole metadata value on the Stripe product.
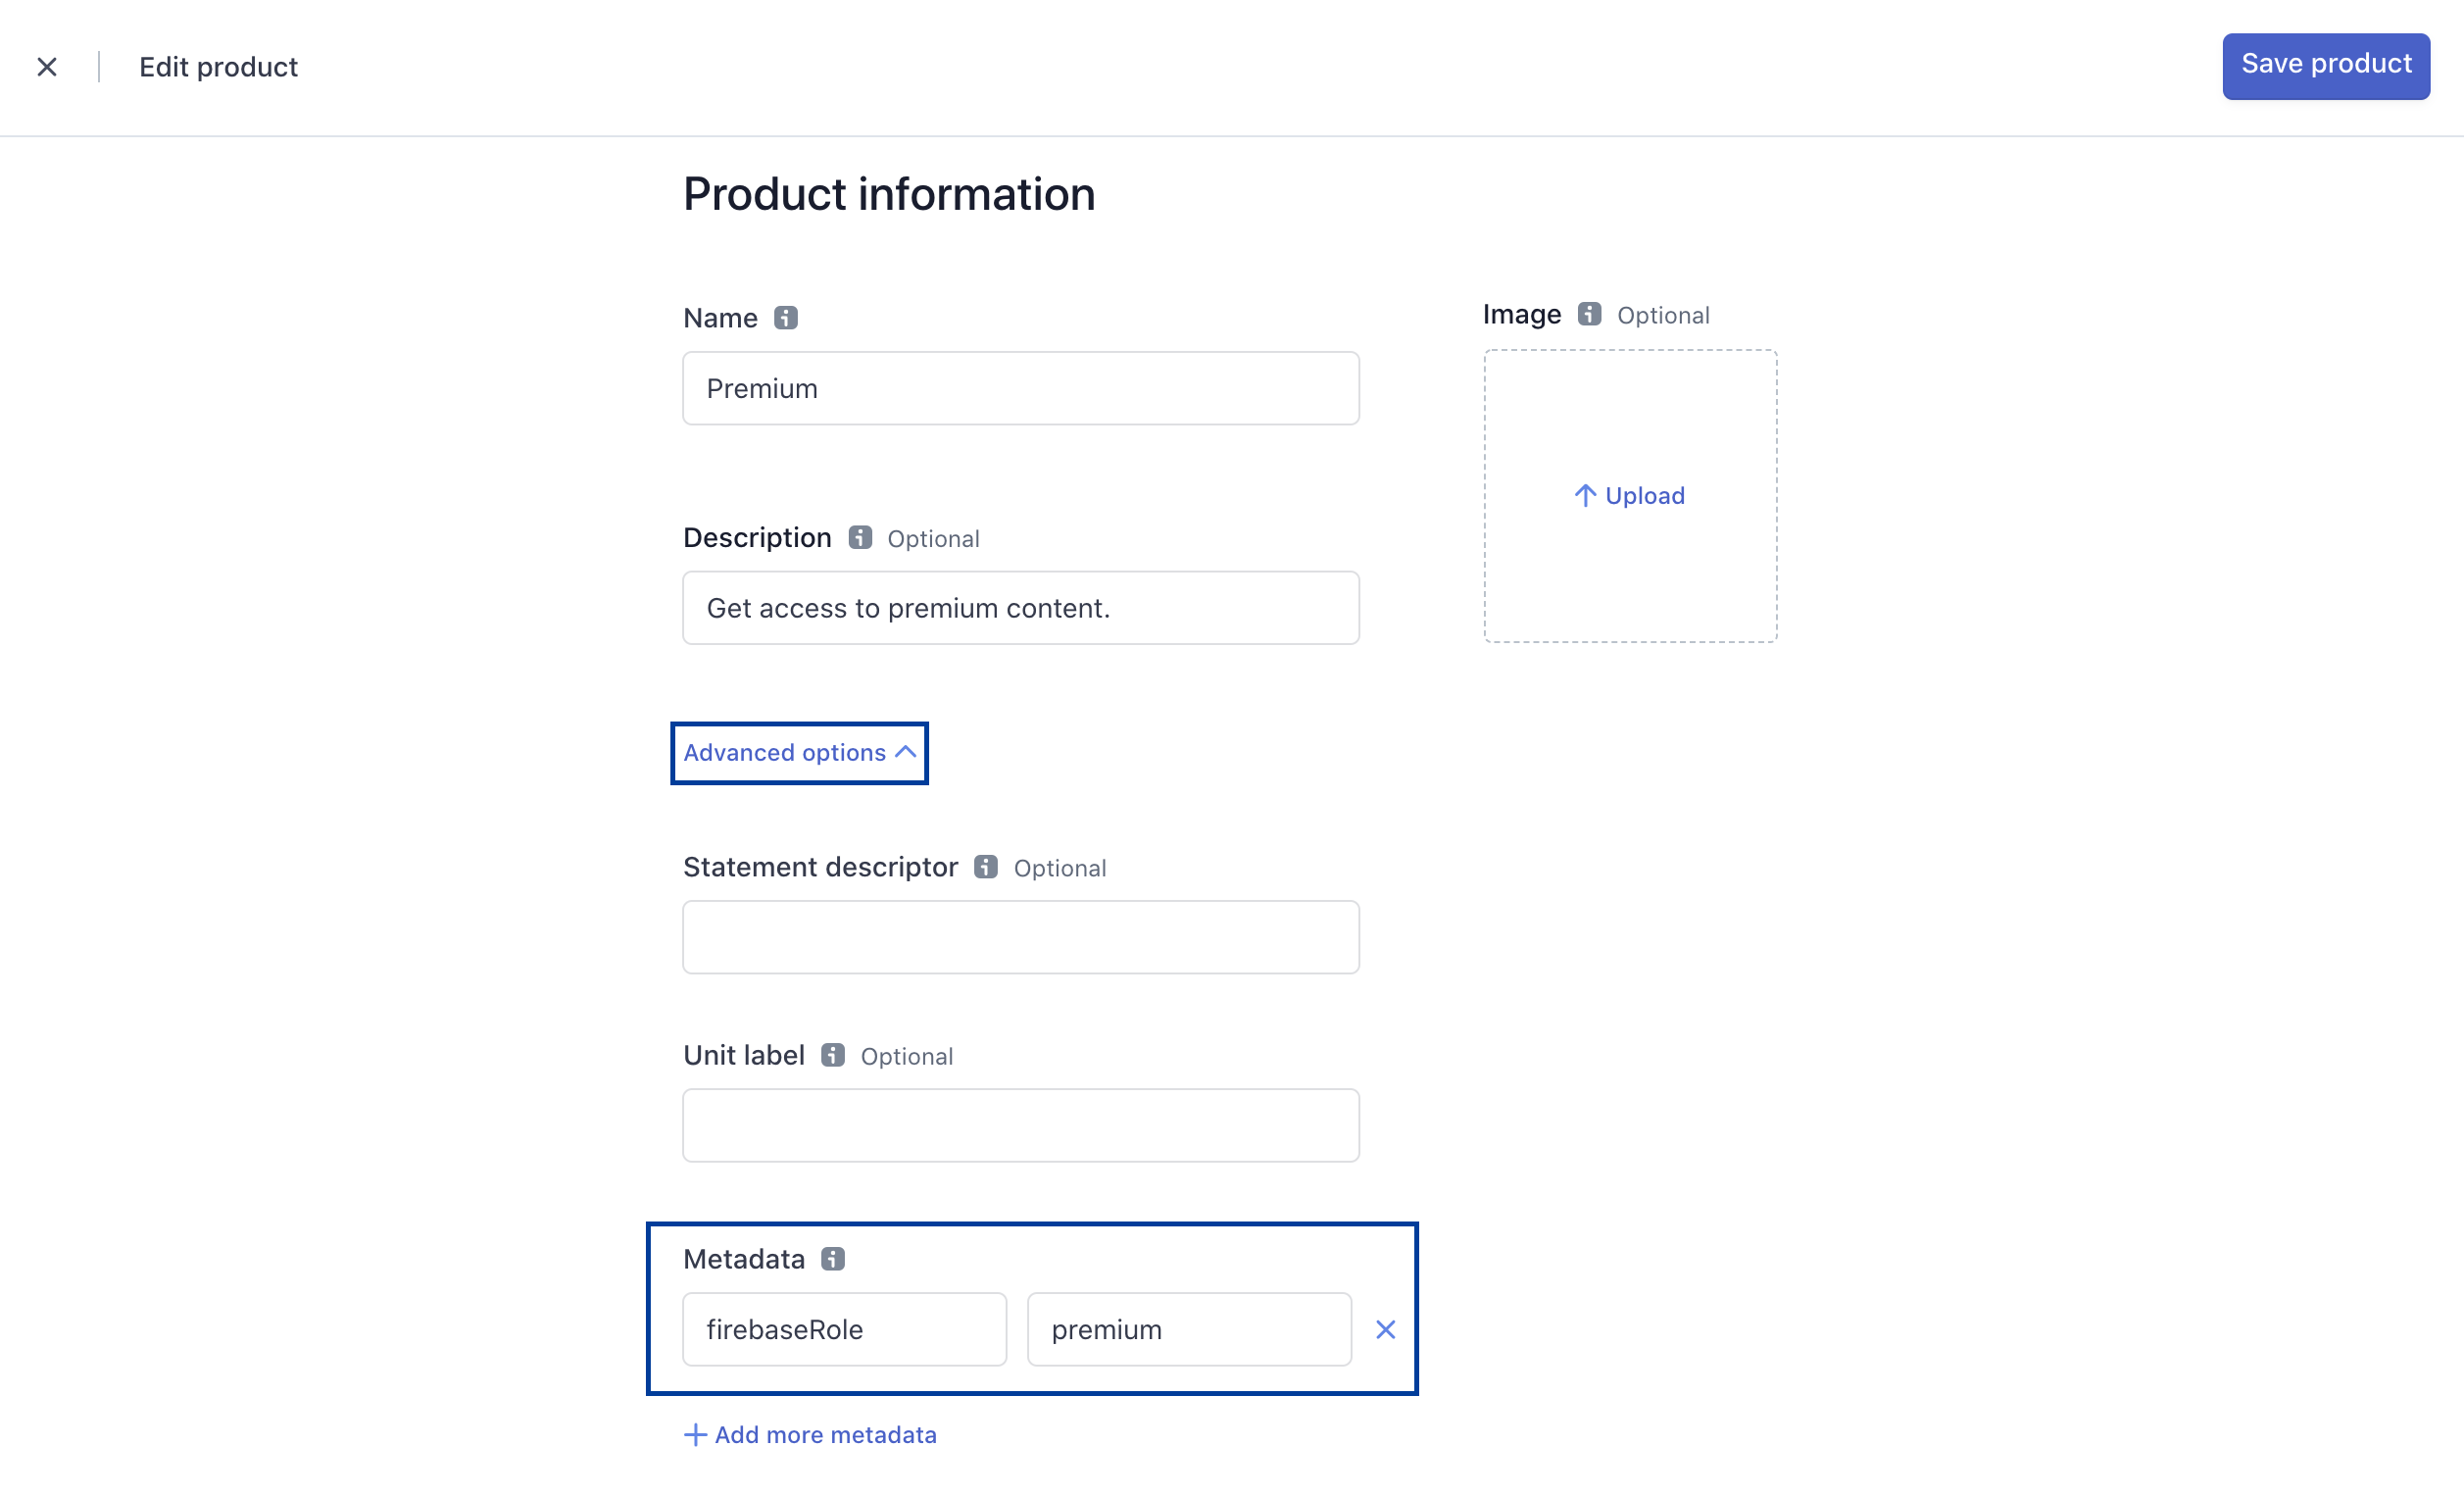
The value you set for firebaseRole (e.g. "premium" in the screenshot above) will be set as a custom claim stripeRole on the user. This allows you to set specific security access rules based on the user's roles, or limit access to certain pages.
Configure the Stripe Customer Portal
- Set your custom branding in the settings.
- Configure the Customer Portal settings.
- Toggle on "Allow customers to update their payment methods".
- Toggle on "Allow customers to update subscriptions".
- Toggle on "Allow customers to cancel subscriptions".
- Add the products and prices that you want to allow customer to switch between.
- Set up the required business information and links.
Set up Stripe
Let's install the Stripe React library.
$ yarn add @stripe/stripe-jsNext, we need to load Stripe with our publishable key. This will return a Promise that resolves with the Stripe object once it's finished loading. You can grab the publishable key from your Stripe dashboard. Add the value to your .env.local file named NEXT_PUBLIC_STRIPE_PUBLISHABLE_KEY.
lib/stripe.js
import { Stripe, loadStripe } from '@stripe/stripe-js';
let stripePromise;
const getStripe = () => {  if (!stripePromise) {    stripePromise = loadStripe(process.env.NEXT_PUBLIC_STRIPE_PUBLISHABLE_KEY);  }
  return stripePromise;};
export default getStripe;After finalizing your Stripe account details for your production account, you can then add the new publishable key to your production environment variables inside Vercel.
Upgrading Extensions
Inside the Firebase Extensions console, you have the ability to update the Stripe extension. This includes a change log so you can see exactly what's new. For example, support for promotion codes was recently added.